Stay informed
Subscribe to our newsletter if you'd like to stay informed about Shoutem Extensions and Shoutem UI Toolkit.
You’re satisfied with how your app looks and you want to publish it to the store. This tutorial shows you how to publish your app to both the App Store and Google Play. We’ll also describe what it means to republish and how to maintain the data in your app.
There are 2 ways you can publish your app:
Once your app is published, for any changes you do in the Builder (except for changes in data on Shoutem Cloud Storage) and want to get onto the live app, you will need to republish the app. Shoutem does the republishing automatically for you and most of the changes will be available seconds after you click the Republish button.
As the data used in app might change over the time, we made it easy for you maintain it using the Shoutem CMS.
The Shoutem platform’s goal is to cover the complete process of app developing: from prototyping, developing, designing, to publishing and maintaining. That’s why we developed a tool for automated app publishing, which is integrated into the Shoutem Builder.
The only prerequisite to publish an app using Shoutem is to have your developer accounts ready. If you don’t have them, creating them is easy:
There are three simple steps to publish your app:
Publish buttonThe first two steps are only done once.
You need to grant Shoutem permission to stores where you want to publish your app.
App Store
Go to Settings -> Store metadata and the iOS tab should be selected. Find the iOS Developer Account field and enter your credentials there. Don’t worry - our tool will only handle new apps and won’t do anything that you don’t want it to do. If, however, you don’t want to share your credentials with us, there’s a slightly more complex way to grant us permission to the Apple Developer portal and iTunes Connect separately. For that, you should contact our support.
Google Play Store
Go to Settings -> Store metadata and select the Android tab. Find the Google Play Android Developer Account field. You will find these steps to invite a new user:
You need to invite shoutem@shoutem.com to use your Android dev account as an administrator.
Log in to your Android developer account
Click 'Manage user accounts...' link
Click 'Invite a new user button'
Enter 'shoutem@shoutem.com' and send invitation
Once you do that, write your Android developer account owner and console account name.
Instead of going to each store to fill in app information, we’ve put everything in one place. Go to Settings and fill out information under App info and Store metadata.
Publish ButtonAfter you finish the first two steps, click the Publish button. Your app will go into the review process in both stores and we’ll be notifying you of the process.
Once your app is published, the Publish button will become Republish.
Using Shoutem, in most cases the republishing of your app lasts a few seconds. Changes that you made in the app’s colors, settings, RSS feeds, order or number of extensions being used in the app structure, all of that will be visible immediately once you click the Republish button. Even installing new extensions, updating existing extensions or uninstalling extensions will be visible automatically.
The only two changes that will require an app to go over the reviewing process in the stores are:
In those cases, you still just have to click the Republish button and we’ll take care of the rest and will notify you of the process.
Once your app is live, you might want to change some data that’s being used in the app. The data shown in Shoutem CMS (used in Shoutem Cloud Storage) is live and changes to it will be immediately visible in the apps using Shoutem Cloud Storage. This is also the case for manually published apps using Shoutem Cloud.
If you want to have a complete overview of what publishing of your app looks like, you might want to publish your app manually. The process is longer, but is functionally identical to publishing a regular React Native app. Here we describe the required steps for both stores.
Also, it’s not possible to manually publish to the App Store if you don’t have an Apple Device (MacBook, Mac-Mini, MacPro).
This is the manual process for publishing an iOS app to the App Store.
To prepare your app for release, you will have to use shoutem configure --production in the cloned app’s directory. This will bundle the assets of the app as well as configure all relevant files to utilize Builder defined values (e.g. bundle ID, Push Notifications, Analytics, etc.).
Furthermore, you can customize the bundle ID for your app via the iosBundleId and androidApplicationId properties in the config.json file in the cloned app’s root directory. These settings override the Builder defined values.
After doing this short step, the build process is functionally identical to a normal React Native app.
Once you have the build ready, you can start preparing your app for the store.
You will need to make an iOS distribution certificate and matching distribution provisioning profile for your app. Here’s a short video tutorial on how to do it:
You can also use Apple’s guide where each step is explained in more detail.
Once you have an unsigned build (.ipa), you will need to resign it. You can do it quickly with the Terminal by using Fastlane’s sigh tool.
Once sigh is installed, use:
$ fastlane sigh resign
...
Successfully signed ShoutemApp.ipa!
Note
Before you start this command, make sure you’ve added your desired certificate into your keychain.
Note
sighwill find the build file and the provisioning profile for you if they are located in the current folder. If they’re not in the current folder, provide more information tosigh:fastlane sigh resign ./path/app.ipa --signing_identity "iPhone Distribution: Dummy user" -p "my.mobileprovision"
iTunes Connect is Apple’s service for uploading your app and its metadata. From there, the app will eventually become available in the App Store. Let’s create an app there.
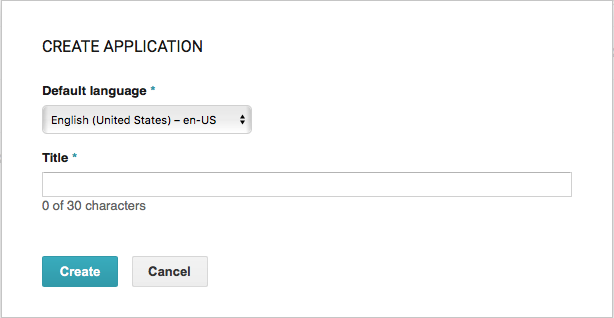
Login to iTunes Connect with your iOS Developer account, click on My Apps, then click on the + in the top left corner. You should get this menu:
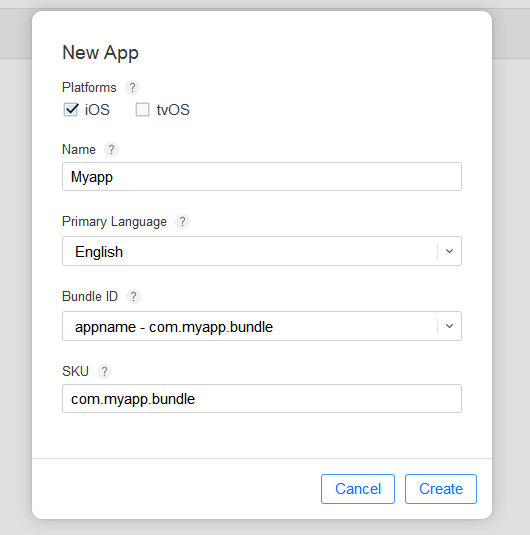
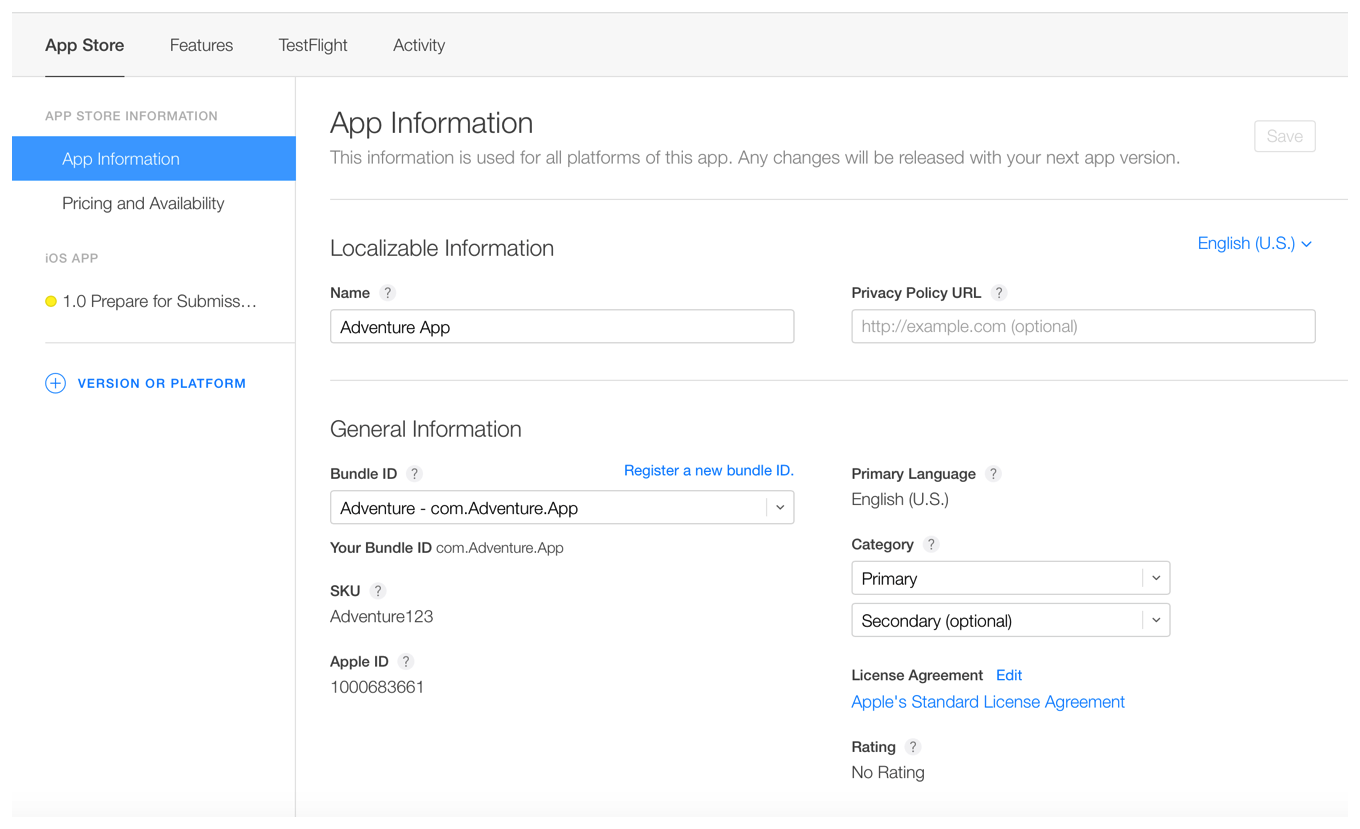
Fill your app details. Once you are done with that, click on Create. Your app is now created on iTunes Connect and you are few steps away from publishing it. Fill the details of your app’s privacy policy link, category and license agreement.
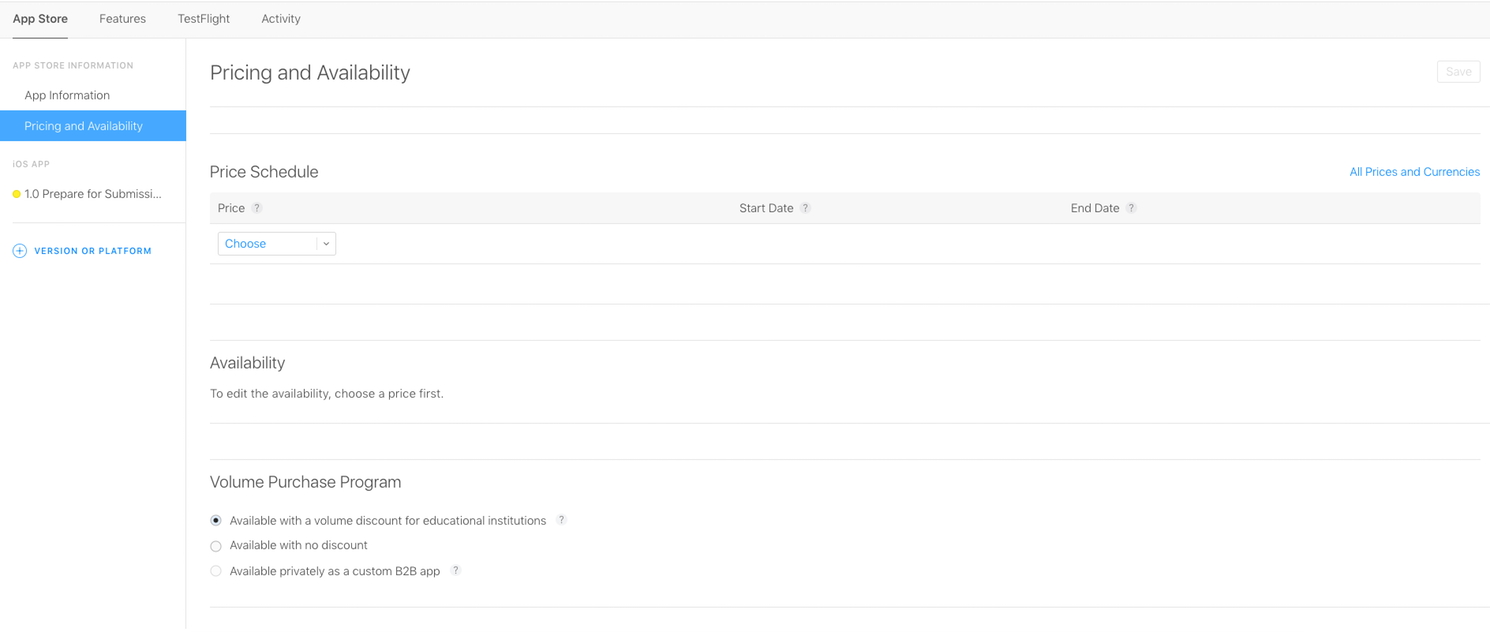
In Pricing and Availability, choose to make your app free or paid and in which countries you want to make it available.
Upload app’s metadata. Click on iOS app which is currently in “Prepare for Submission” state. On this screen, you will upload your app’s screenshots, add it’s description, keywords, support URL, content rating, app store artwork and review contact information.
After doing so, upload your build file (.ipa). To upload it, you use tool called Application Loader, which is one of the tools that comes along with Xcode. Find it in Xcode: Select Xcode in the menu -> Open Developer Tools -> Application Loader. This is what you should get:

Login with your iOS Developer account, choose the “Deliver your app” option and upload your .ipa file to iTunes Connect.
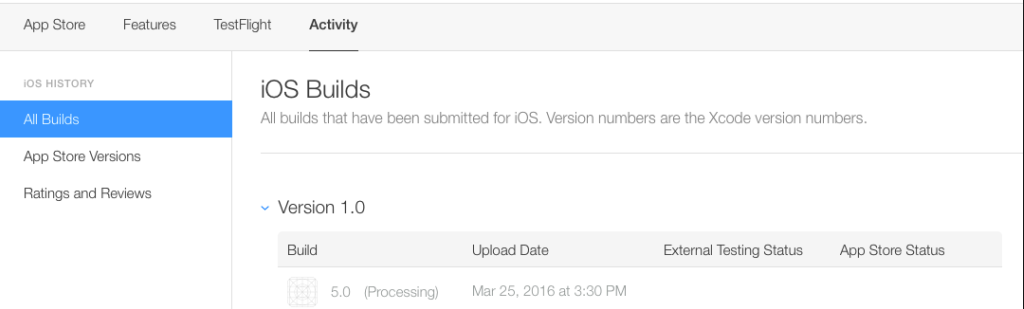
After uploading it, the app will go trough processing time in iTunes Connect. Processing time can vary from few minutes to few hours (even days) and it depends on the stability of the Apple’s services. If you click on the Activity tab in iTunes Connect, you will see this while your app is in processing time:
Once the processing of your app is done, go back to your iOS app and scroll down to the Build section. You’ll notice that a little + sign has appeared next to Build.
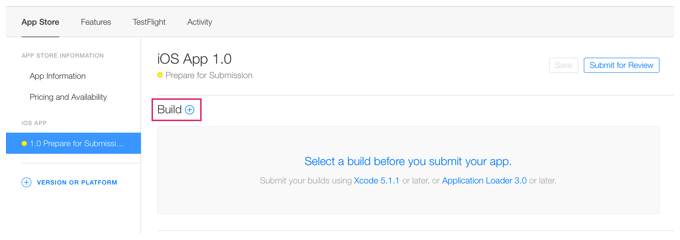
Click on it and the build of your app is processed and ready for preview. After adding a build, click on the Submit for Review button in the top right corner.
Finally, you need to declare your app’s export compliance, content rights and advertising info:
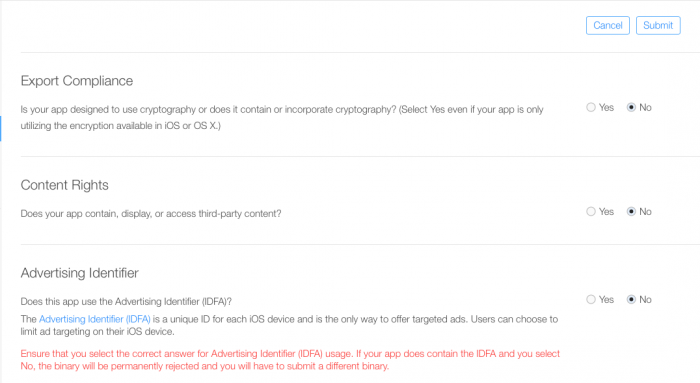
Answer those questions and click the Submit button. Your app status will change to “Waiting for review” state which means that your app has been sent to Apple’s review team.
Apple usually takes 2-3 days to review apps. Once they approve (or reject) the app, you should get the confirmation e-mail to your owner’s e-mail regarding the review.
If you make some changes in the app (colors, titles, change which extensions you use or their order), you will need to republish your app. Manual republishing of the app requires you to go through all the steps described here except creating new developer account and certificates.
Once your app is live, you might want to change data used in the app. The data shown in Shoutem CMS (used in Shoutem Cloud Storage) is live and changes to it will be immediately visible in the apps using Shoutem Cloud Storage.
This is a manual process of publishing an android app in the Google Play Store.
To prepare your app for release, you will have to use shoutem configure --production in the cloned app’s directory. This will bundle the assets of the app as well as configure all relevant files to utilize Builder defined values (e.g. bundle ID, Push Notifications, Analytics, etc.).
Furthermore, you can customize the bundle ID for your app via the iosBundleId and androidApplicationId properties in the config.json file in the cloned app’s root directory. These settings override the Builder defined values.
After doing this short step, the build process is functionally identical to a normal React Native app.
Once you have the build ready, you can start preparing your app for store.
Once you have an unsigned build (.apk) you need to sign it with your own keystore. Here’s the official documentation on how to do that.
Basically, these are the steps you will need to do:
$ jarsigner -verbose -sigalg SHA1withRSA -digestalg SHA1 -keystore mykey.keystore myfile.apk alias_name
After your .apk file is signed, it’s ready for the zipalign process.
$ cd /path/to/your/android-sdk/build-tools/22.0.1/
$ ./zipalign -v 4 /path/to/unaligned.apk /path/for/release-aligned.apk
Create your app in the Google Play Developer Console. Log in with your Android Developer account credentials and select Add New Application in the Google Play Developer Console panel:
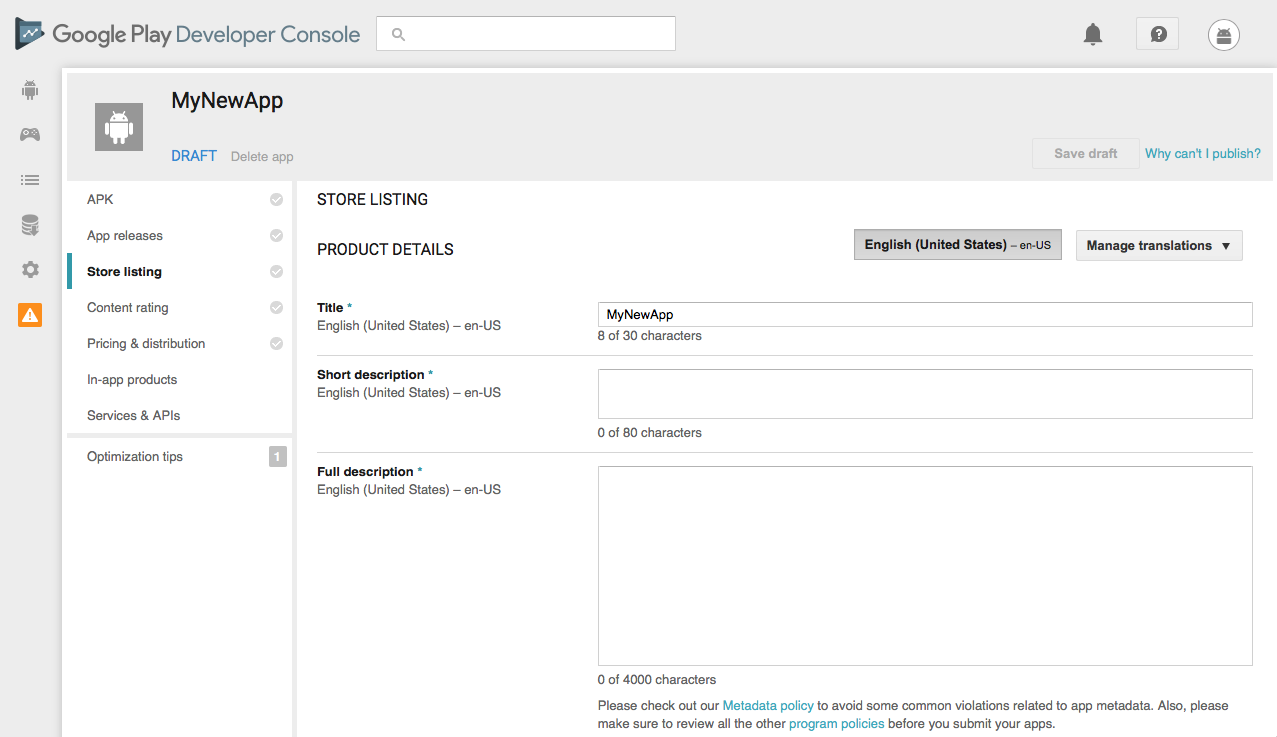
Once you’ve entered that information, you’ll be taken to the Store Listing screen, where you need to update your app’s short description, description, screenshots, featured graphics, category and application type and add link to your privacy policy:
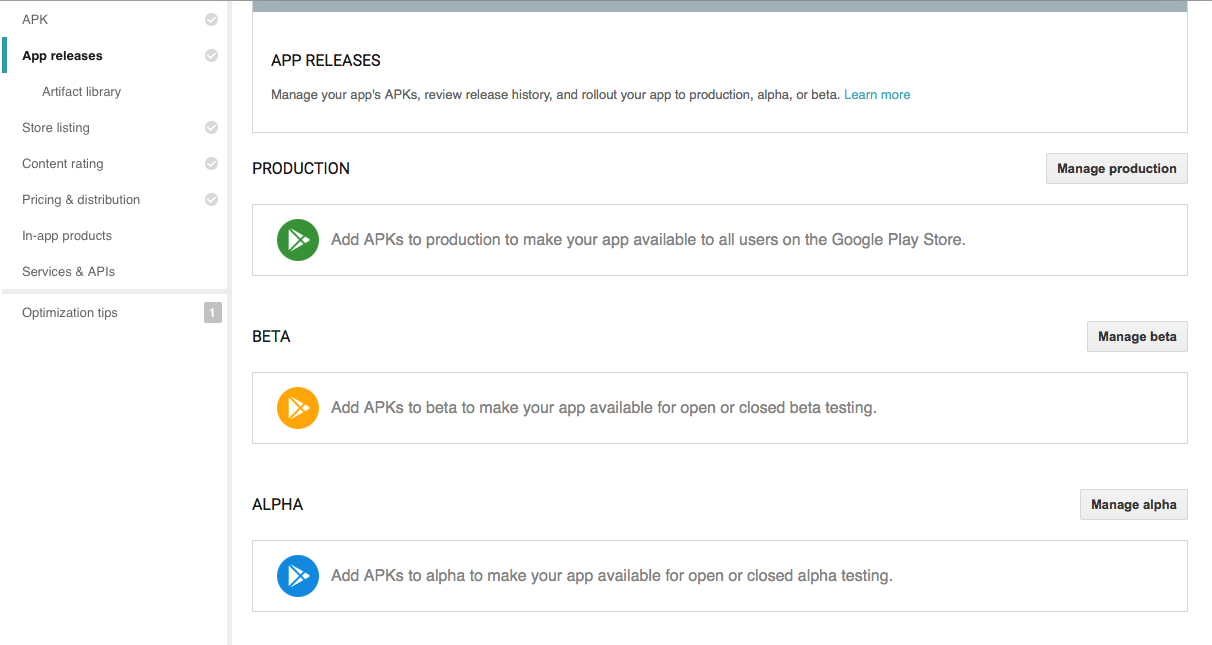
Under the App Releases tab, choose how you want to publish your Android app - is it for production, beta or alpha:
The process is pretty much the same for each release, so we will cover production release. Click on Manage production and then on Create New. This will take you to:
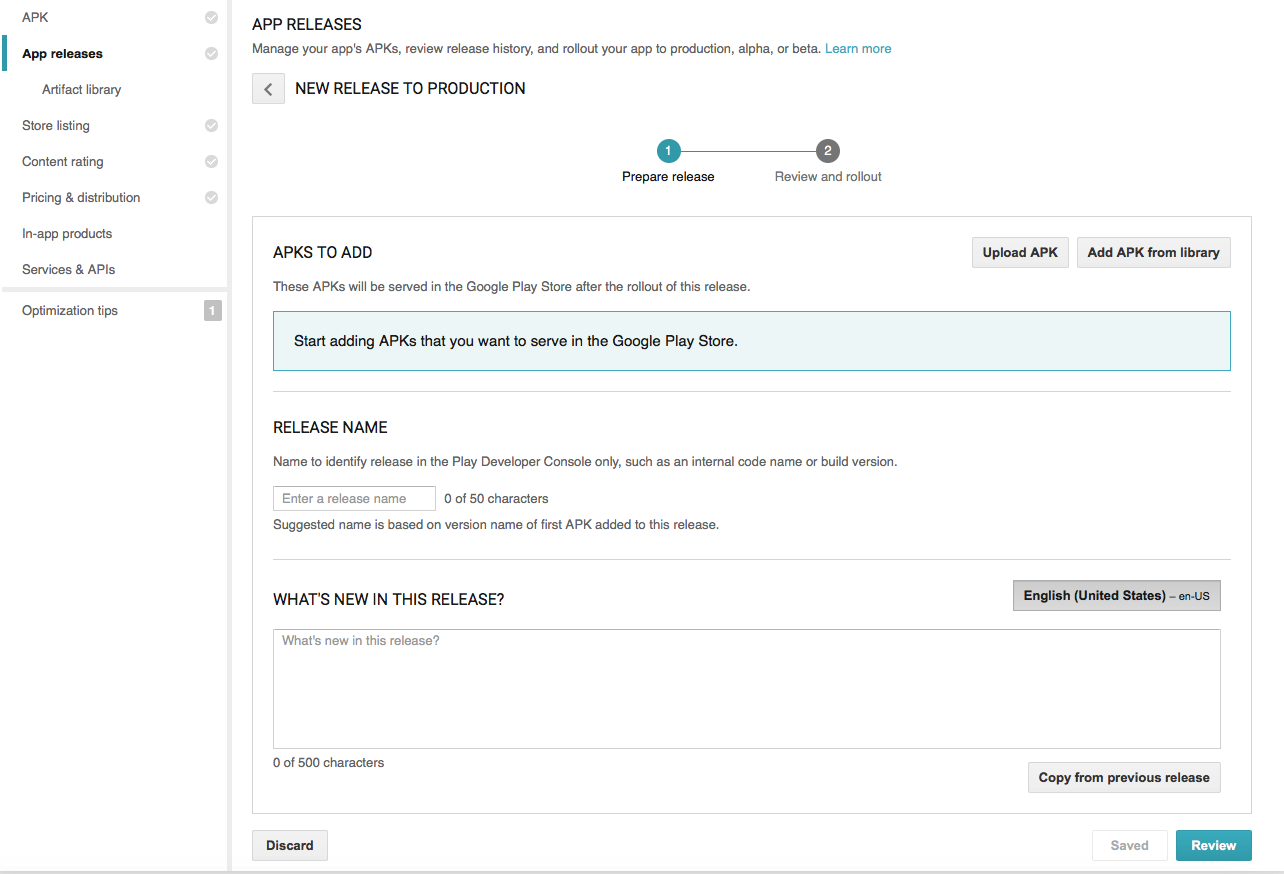
Here you can upload your .apk file, choose the release name and “What’s Next” text. Once you’re done, click on Review.
Answer Google’s content rating questionnaire and choose your app’s content category. Add your email address and choose from one of six available categories.
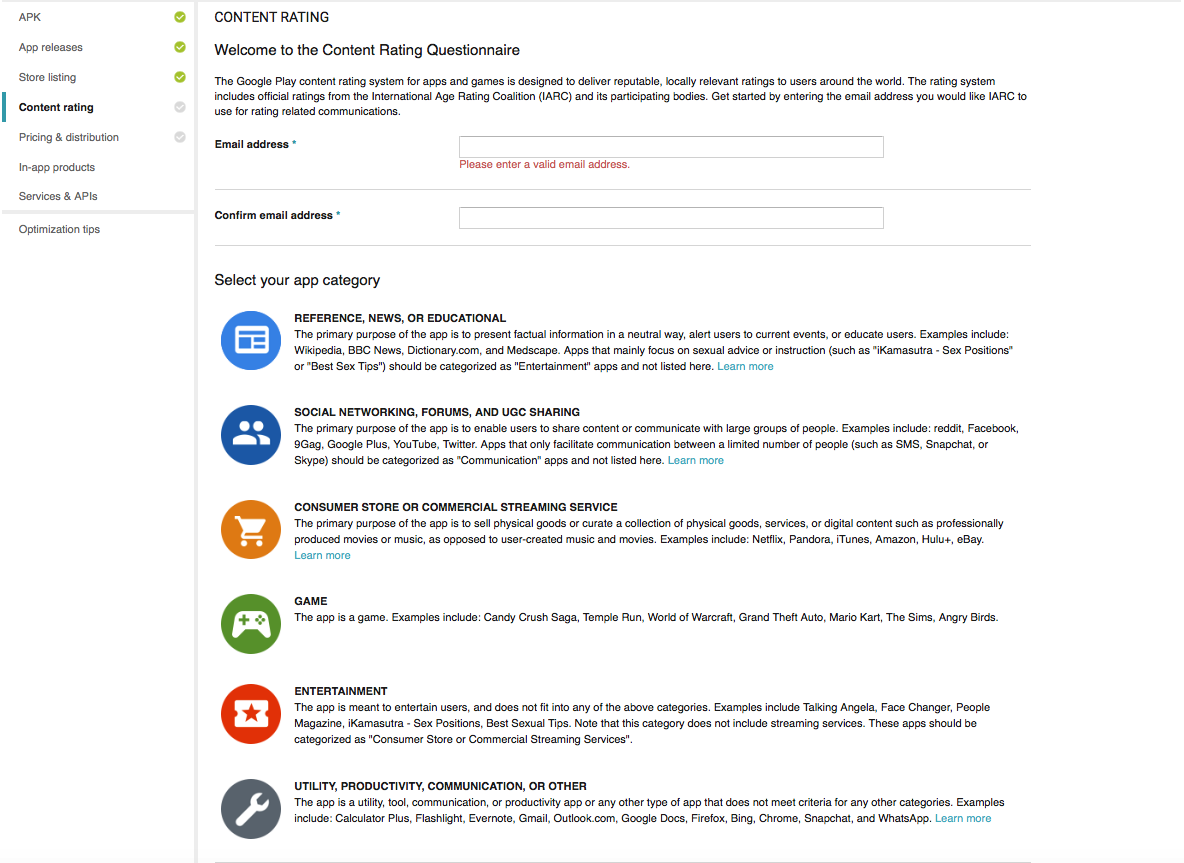
Each category contains slightly different questions which need to be answered mostly as Yes/No questions. Click Save questionnaire, then Calculate rating. You will see the ratings for the various locales where your app may be on sale. Scroll to the bottom of the list and click Apply rating. The Content Rating check mark is now green.

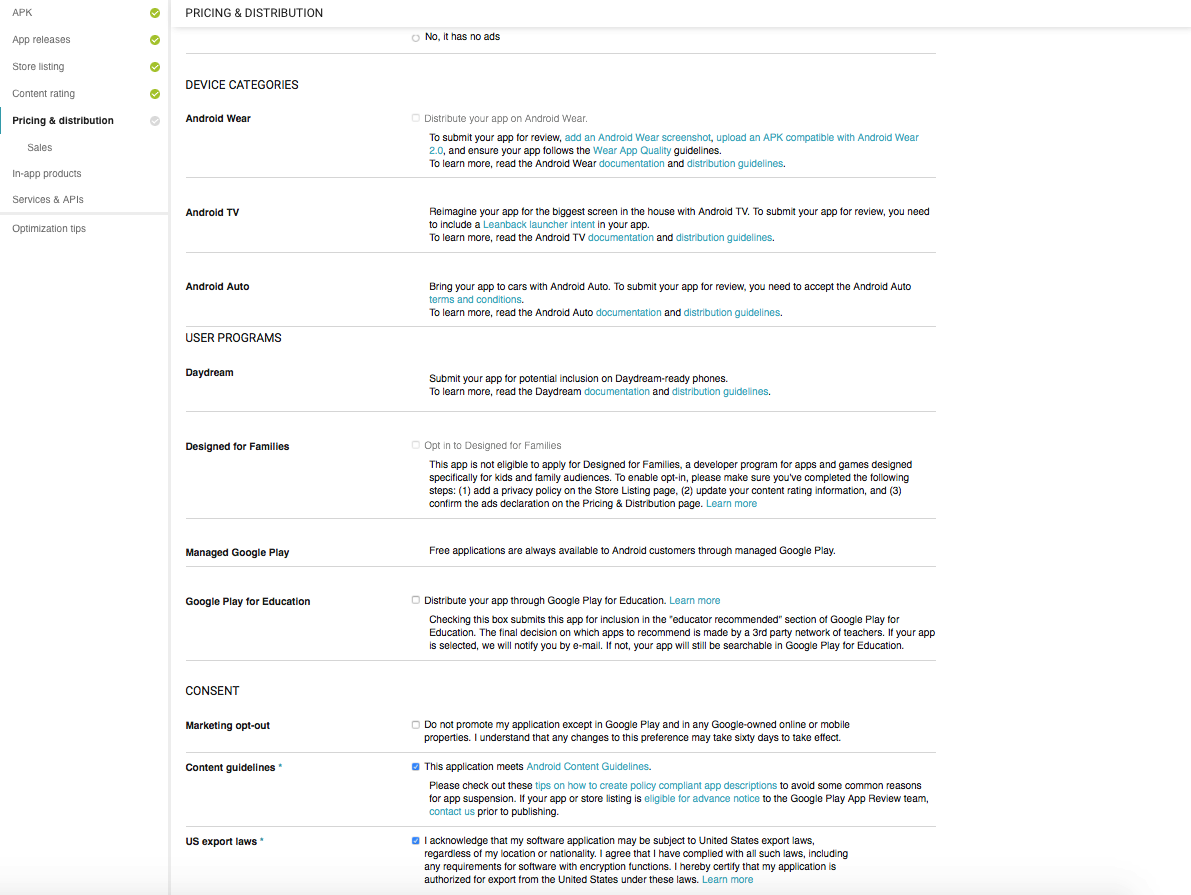
Select the Pricing & Distribution check mark for the final step: setting the price of your app and in which countries it will be available.
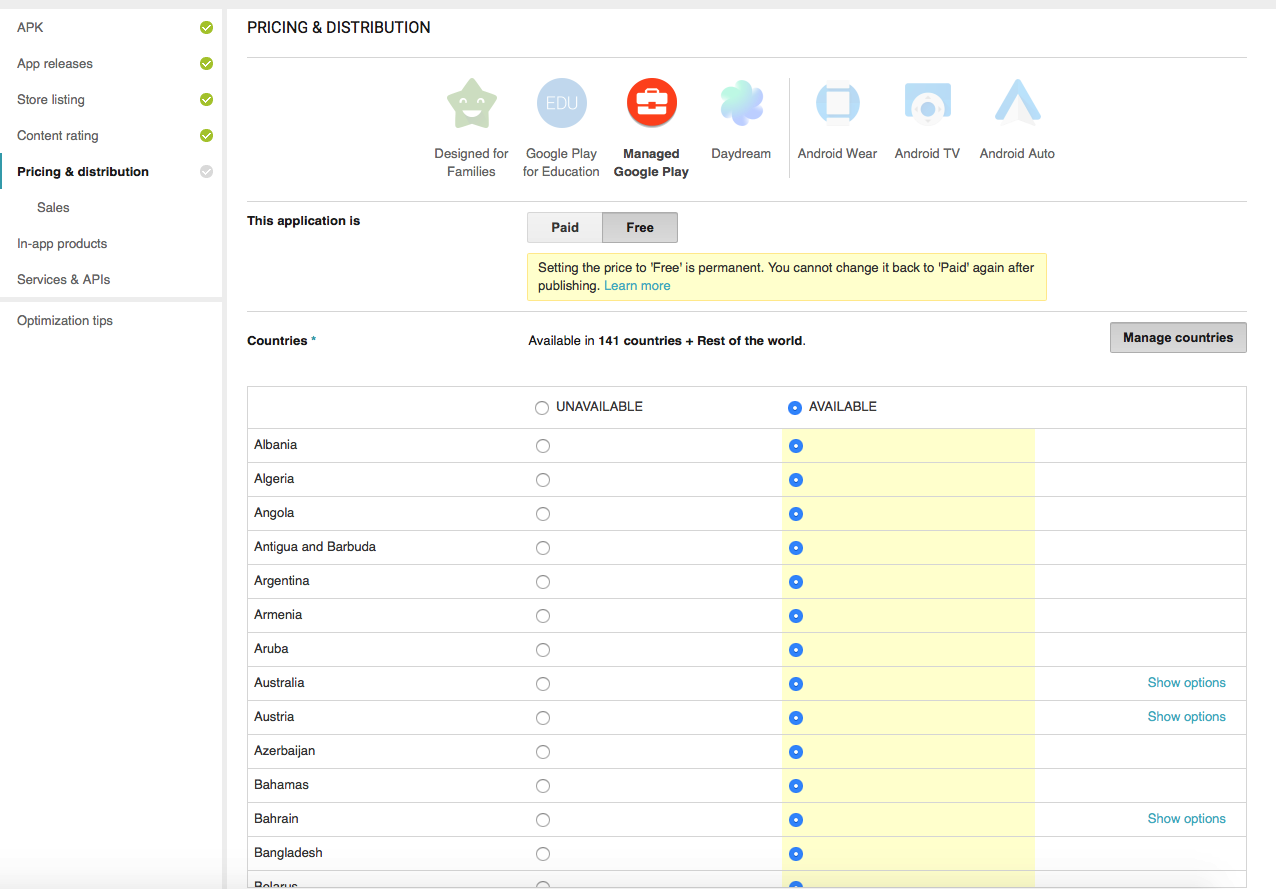
Below this, there are a few checkbox questions regarding your app distribution. Check the boxes by Content guidelines and US export laws to indicate your app’s compliance with relevant rules, then scroll to the top of the page and click Save draft.
Select your App Release tab again and select Edit release under Manage Production:
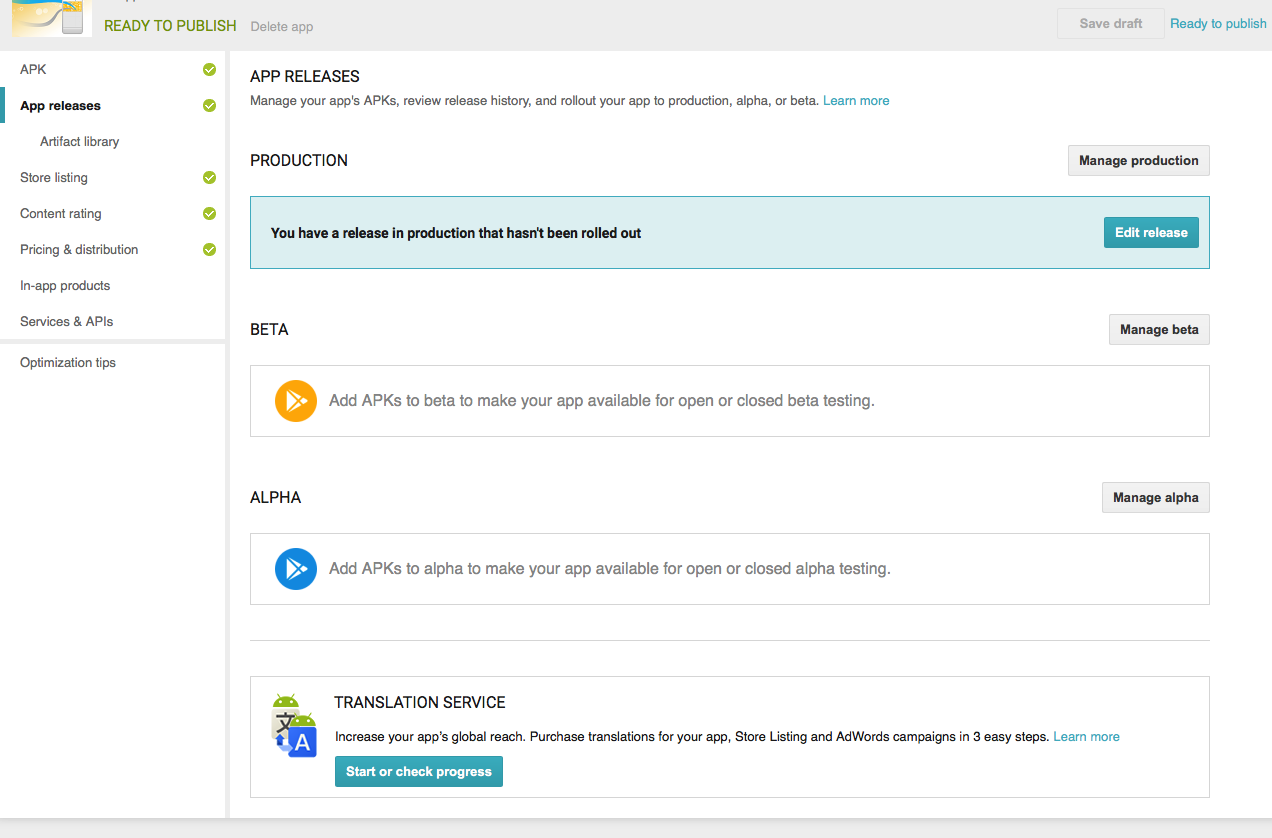
Scroll down, click on the Review button. Check your app details and if you are satisfied, click on the Start rollout to production button to publish your app in the Google Play Store. Clicking on the confirm button, you will publish your app in the Store!
If you make some changes in the app (colors, titles, change which extensions you use or their order), you will need to republish your app. Manual republishing of the app requires you to go through all the steps described here except creating new developer account and certificates.
Once your app is live, you might want to change the data used in the app. The data shown in Shoutem CMS (used in Shoutem Cloud Storage) is live and changes to it will be immediately visible in the apps using Shoutem Cloud Storage.