Stay informed
Subscribe to our newsletter if you'd like to stay informed about Shoutem Extensions and Shoutem UI Toolkit.
Each screen can have multiple layouts. App owners can choose which screen layout they want to use in their app (e.g. for news from politics they might want to use a layout with smaller images, and for fashion they might want large images). As screen layouts are just plain screens, they can contain different logic than the screen they are altering and can be easily used for A/B testing.
We’ll create a different layout in the Restaurants extension from the My First Extension tutorial, which you can get here. The Restaurants extension has a List screen (for listing all the restaurants) and a Details screen (for details of one particular restaurant).
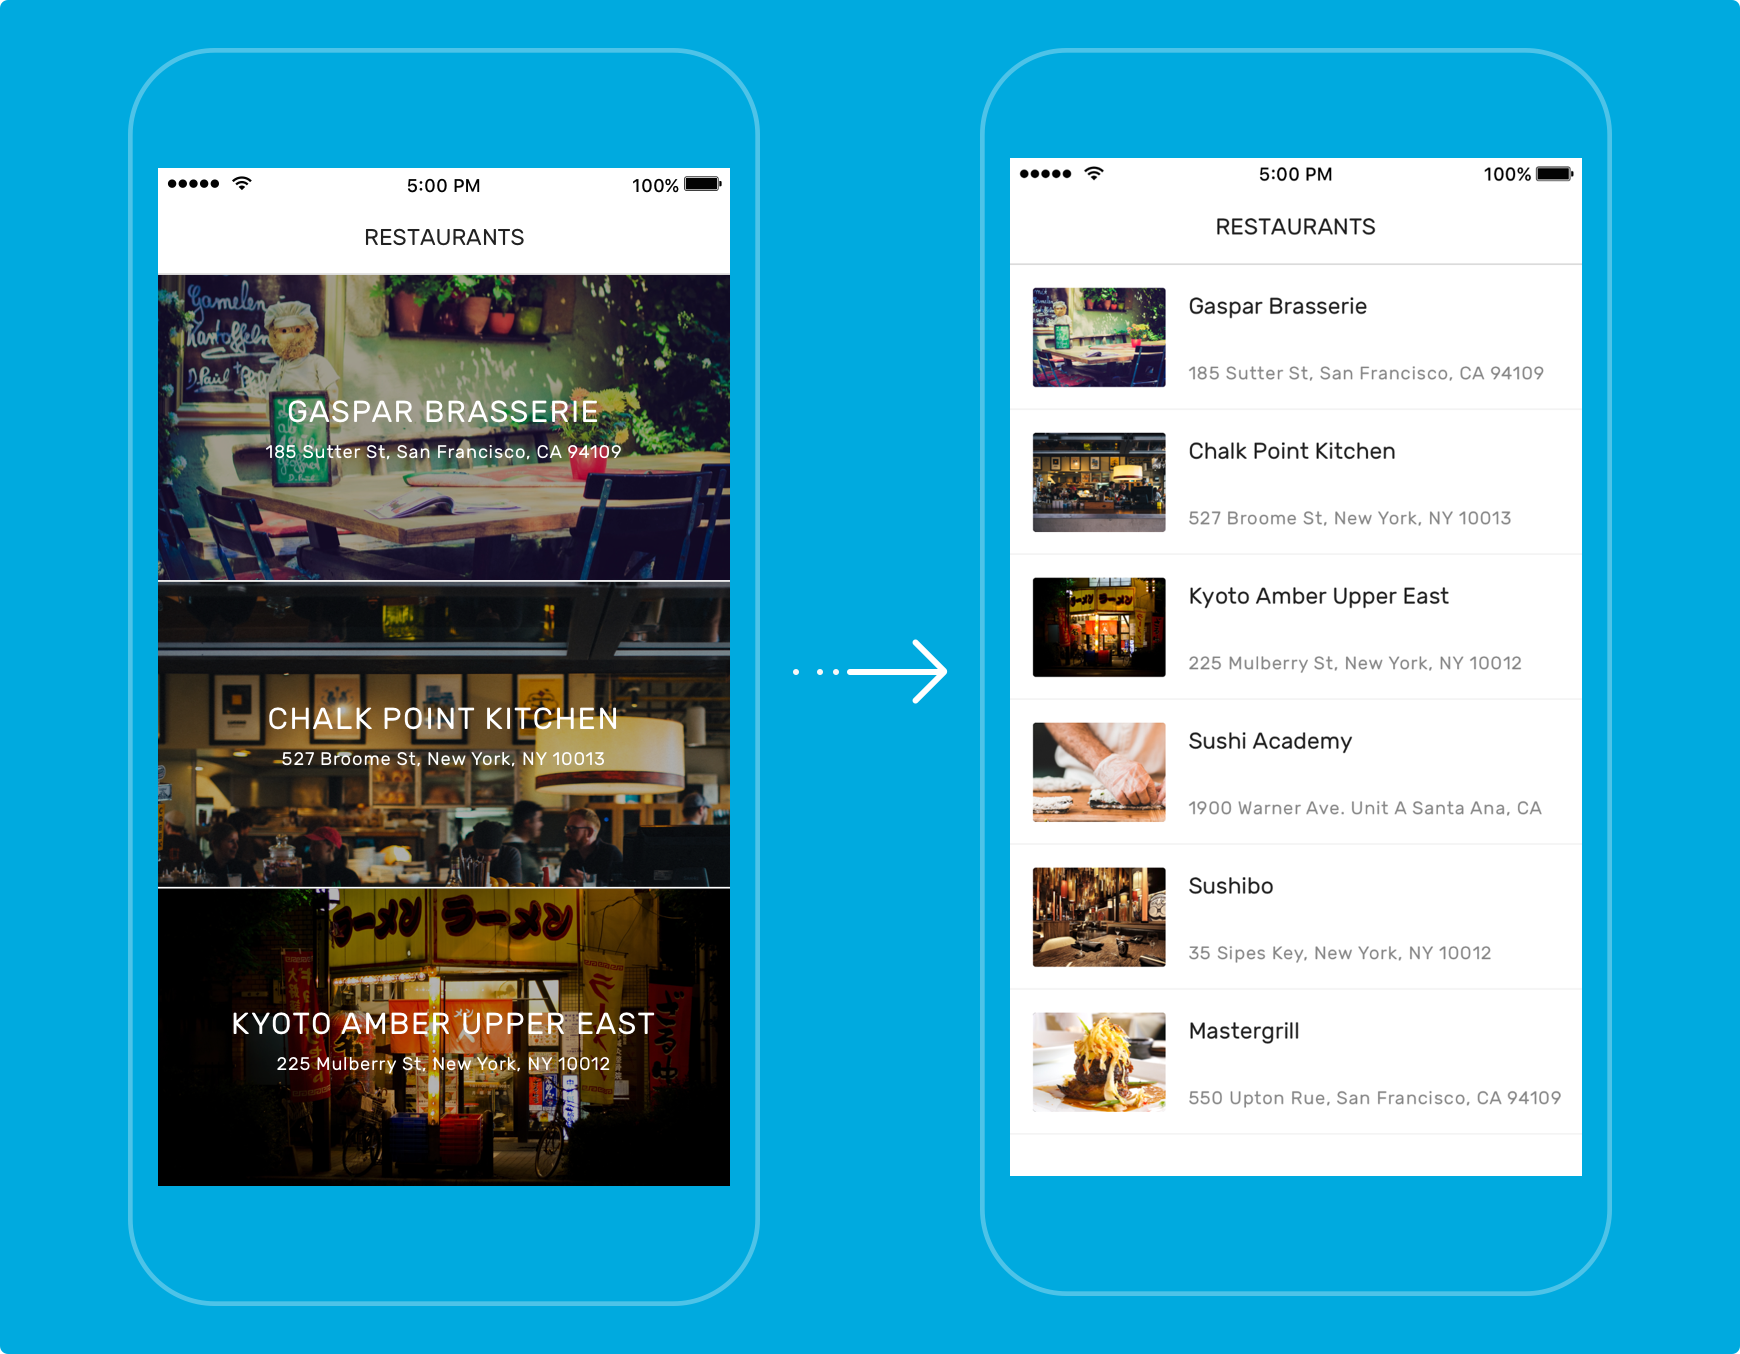
Let’s add one additional screen that will represent an alternative layout for the List screen where we’ll use smaller images as shown here:
Switch over to the extension folder:
$ cd tom.restaurants
Create an additional screen:
$ shoutem screen add SmallList
? Screen name: SmallList
? Create a shortcut (so that screen can be added through the Builder)? No
Success
Again, notice how we didn’t create a Shortcut. That’s because SmallList isn’t the starting screen of the extension, List is. Now extend the List screen and override its renderRow method. We’re going to use the Row component from UI toolkit. This is the complete code for SmallList.js file with the main parts being highlighted.
#file: app/screens/SmallList.js
import React from 'react';
import { TouchableOpacity } from 'react-native';
import { connect } from 'react-redux';

import { navigateTo } from 'shoutem.navigation';

import {
  find,
  getCollection
} from '@shoutem/redux-io';
import {
  Image,
  Row,
  View,
  Subtitle,
  Caption,
  Divider,
  Icon
} from '@shoutem/ui';

import { List } from './List';
import { ext } from '../extension';

export class SmallList extends List {

  // overriding the renderRow function
  renderRow(restaurant) {
    const { navigateTo } = this.props;

    return (
      <TouchableOpacity onPress={() => navigateTo({
          screen: ext('Details'),
          props: { restaurant }
        })}>
        <Row>
          <Image style={{width:90, height:70}} source={{ uri: restaurant.image && restaurant.image.url }} />
          <View styleName="vertical">
            <Subtitle>{restaurant.name}</Subtitle>
            <Caption>{restaurant.address}</Caption>
          </View>
          <Icon name="right-arrow" styleName="disclosure"/>
        </Row>
        <Divider styleName="line" />
      </TouchableOpacity>
    );
  }
}

export default connect(
    (state) => ({
    restaurants: getCollection(state[ext()].allRestaurants, state)
  }),
  { navigateTo, find }
)(SmallList);
The Restaurants extension uses CMS settings page, so app owners can manage data in the app. We need to give them option to chose which layout they want to use. To do that, we’re going to use the layout settings page from the shoutem-layouts extension.
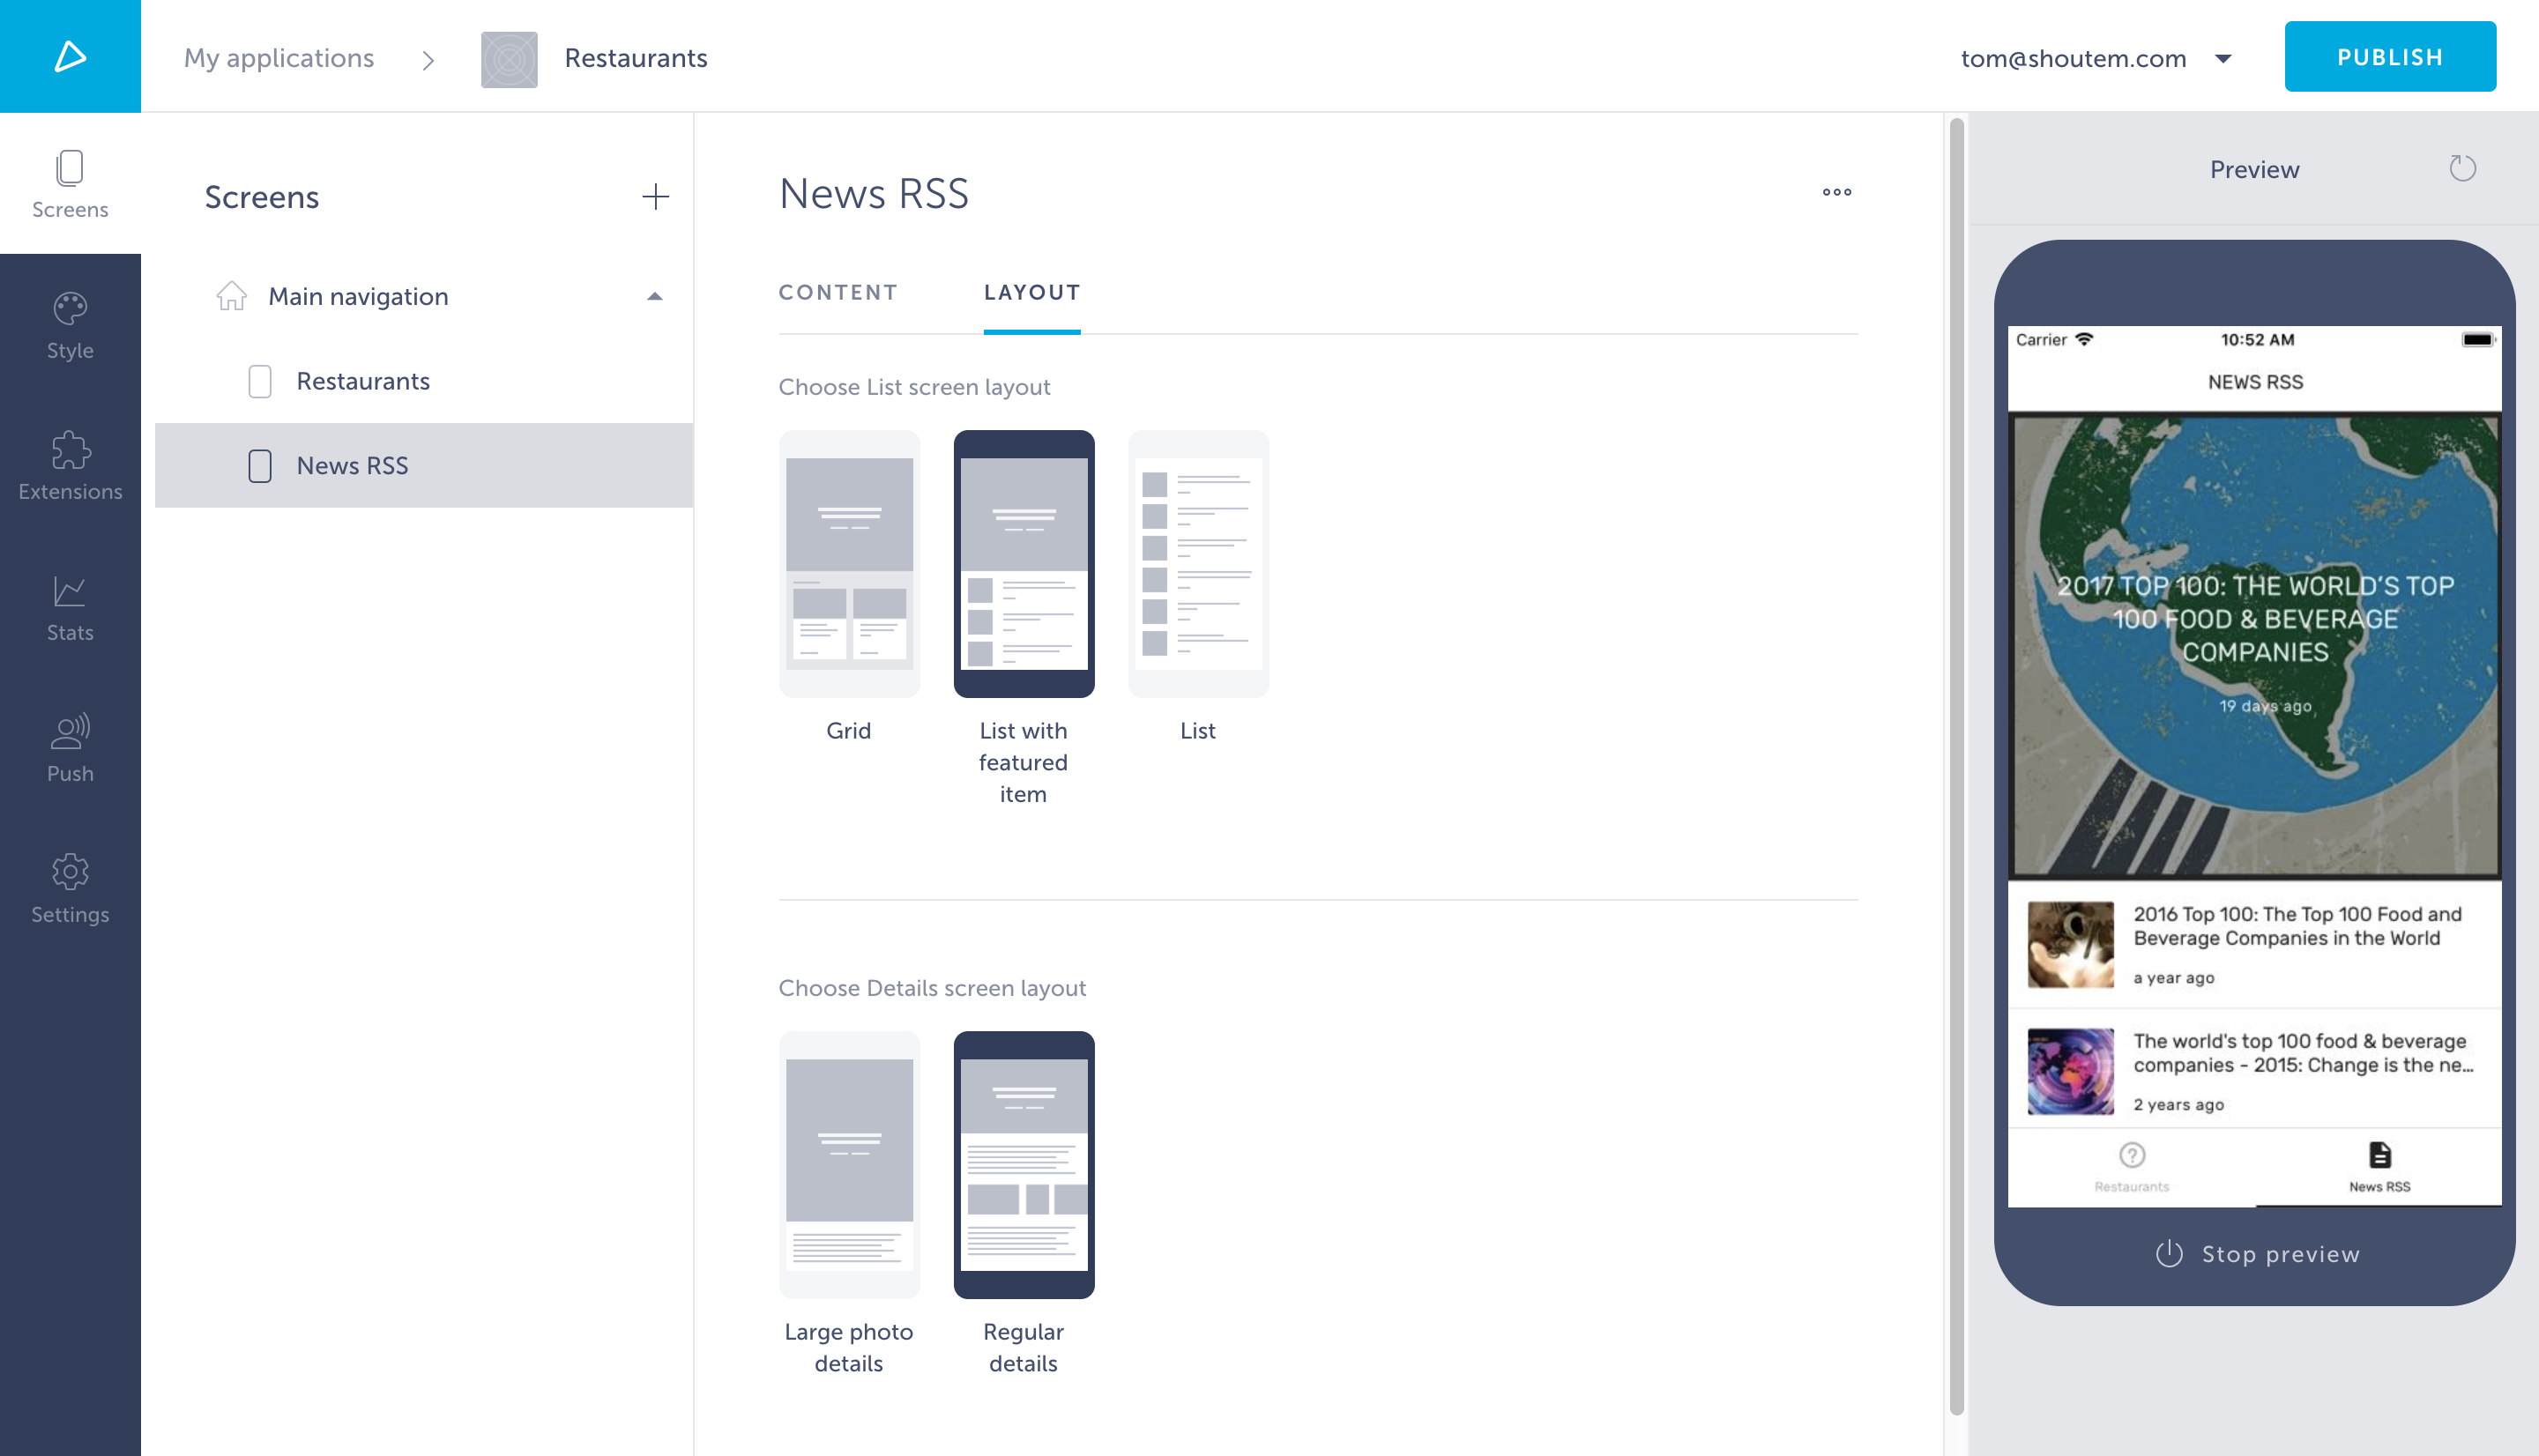
The layout settings page resolves which screens have multiple layouts and shows the layout selectors for them. Example of two layout selectors for Shoutem’s News RSS extension is shown below.
For the layout settings page to be able to resolve which screens should show layout selectors, we need to add the extends property to screens which act as additional layouts, referencing the “default” layout. Screen layouts inherit all the properties from extending screens and can override them.
Reference the layout settings page in the adminPages shortcut and extend the screens in extension.json.
#file: extension.json
{
  "name": "restaurants",
  "version": "0.0.1",
  "platform": "1.0.*",
  "title": "Restaurants",
  "description": "List of restaurants",
  "screens": [{
    "name": "List",
    "title": "List with large images",
    "image": "./server/assets/large-image-list.png"
  }, {
    "name": "Details"
  }, {
    "name": "SmallList",
    "title": "List with small images",
    "image": "./server/assets/small-image-list.png",
    "extends": "@.List"
  }],
  "shortcuts": [{
    "name": "Restaurants",
    "title": "Restaurants",
    "description": "Allow users to browse through list of restaurants",
    "screen": "@.List",
    "adminPages": [{
      "page": "shoutem.cms.CmsPage",
      "title": "Content",
      "parameters": {
        "schema": "@.Restaurants"
      }
    }, {
      "page": "shoutem.layouts.LayoutPage",
      "title": "Layout"
    }]
  }],
  "dataSchemas": [{
    "name": "Restaurants",
    "path": "server/data-schemas/Restaurants.json"
  }]
}
We also included additional properties like title and image to screens which will be shown in the layout selector, so they look nicer. Download this file. It includes screen images that we can use as a preview of the layout in the layout selector. Extract the folder and place it in the server folder of the extension. Here you can find the list of all available properties in extension.json.
If we wanted to show a layout selector for Details screen, we would need to add a navigatesTo property to the List screen. That way, the layout settings page could calculate the screen hierarchy starting from the screen referenced in the shortcut. An example of this can be found in the extension.json file of Shoutem’s News RSS extension.
Ok, now you’re done! Let’s push the extension.
$ shoutem push
Uploading `Restaurants` extension to Shoutem...
Success!
Note
If you don’t have this extension installed on any app, you can install with
shoutem install. Add the screen through the builder, add a few CMS items (Restaurants), as described in Using cloud storage, and run the preview. If you don’t have any restaurants added, you won’t see anything in the preview.
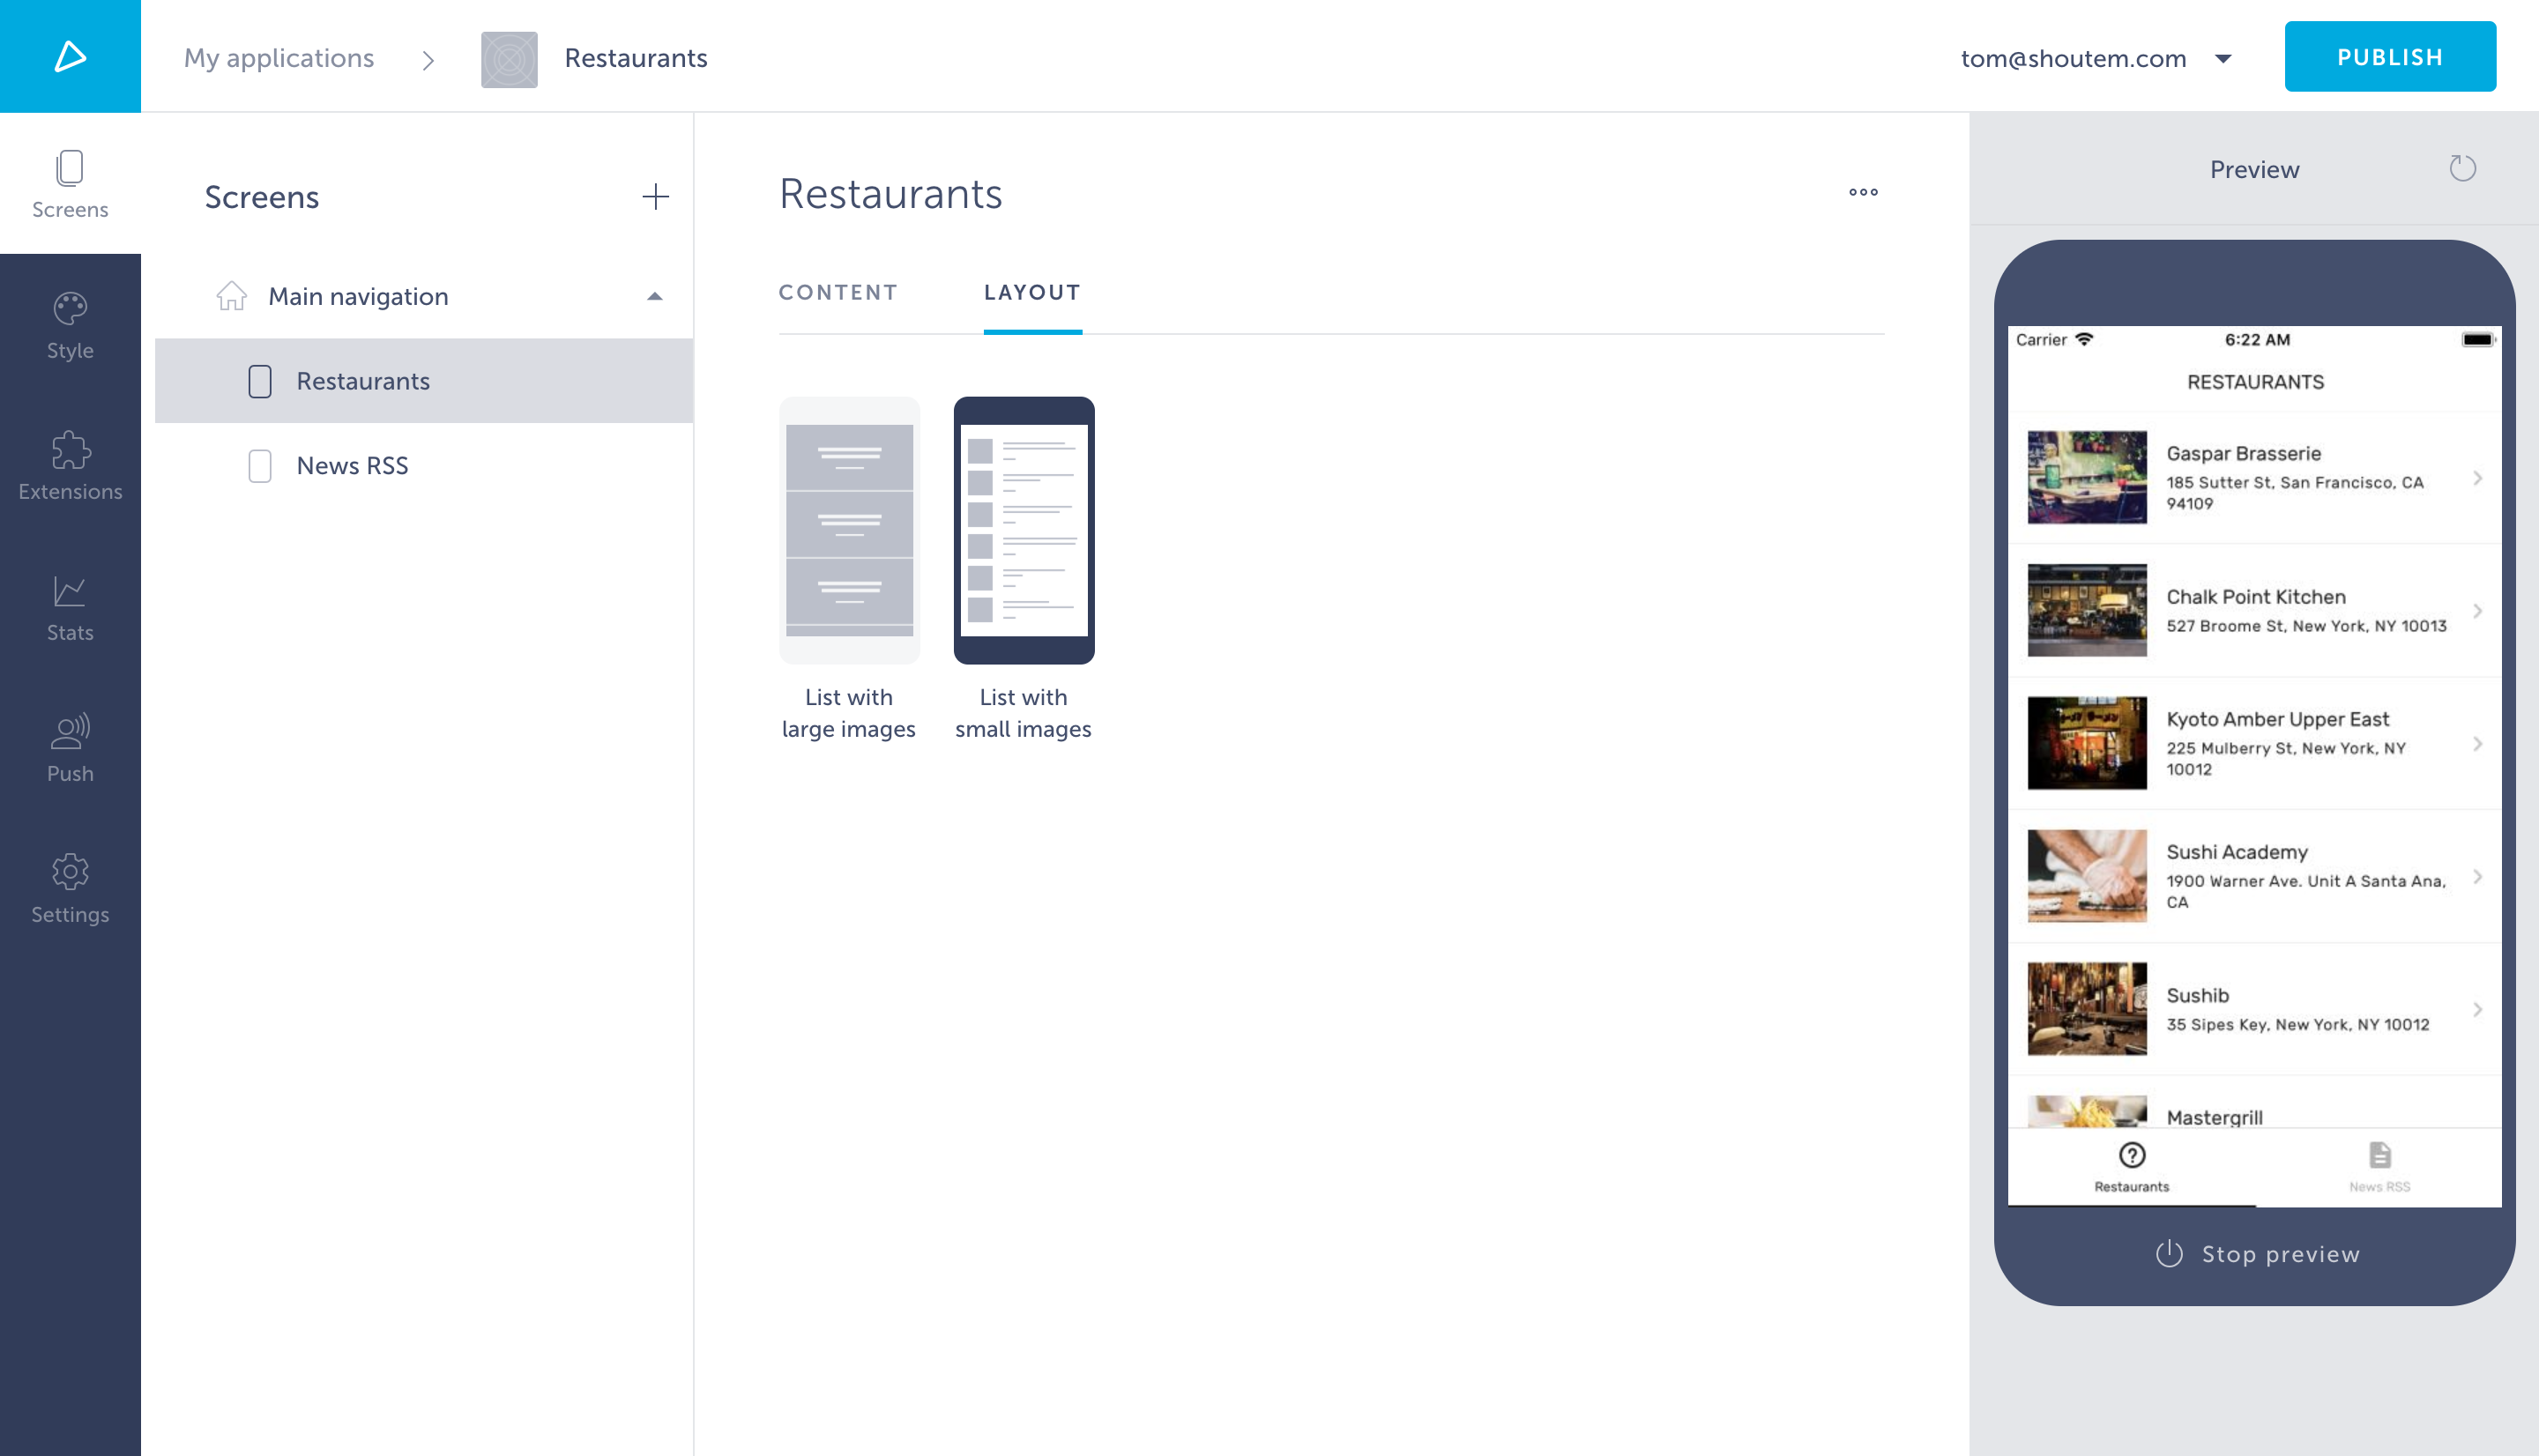
By default, the layout will be the List screen. Switch to Layout and select List with small images. This is the result you should get:
Great job! Now you know how to create additional layouts for your extension.
Since we built this extension, we can add additional layouts to it directly. However, sometimes we want to add additional layouts for extensions from another developer - essentially we want to modify the extensions. You can find out how to do this in the Modifying Extensions tutorial.